淺談 Ubuntu 的 Grub2Ubuntu 從 9.10 的版本開始,在開機結構上有了重大的改變,就是將目前主流的開機管理套件,grub,換成了 grub2,而這不僅僅改變了開機管理的顯示模式,在於開機結構的管理與修改上,也不同於以往單一檔案( /boot/grub/menu.lst )的編輯方式,以及修改即套用的簡易模式。
以一般常見的 Linux 發行套件,如 Red Hat、Fedora、CentOS‥等來說,開機經 Bios 讀取與載入硬體資訊之後,接著就會進入並讀取硬碟 MBR 內的資訊,尋找開機管理員,也就是一般我們常聽到的 lilo、grub ,或是這邊所介紹的 grub2(以 Linix 系統來說),而這些開機管理程式,則紀錄這顆硬碟之上,有哪些作業系統、預設,或可開機的系統是哪一套,以及此套可開機系統所在的分割區位置,因此開機管理程式,在整個開機過程當中,佔有非常重要的角色,一旦 MBR,或是開機管理程式毀損,可是無法進入作業系統之中的。
OK,既然開機管理程式如此重要,那 grub 與 grub2 又有何差別呢?在這邊可以歸類以下幾項:
1、開機管理畫面的差異
以 CentOS 來說,一般預設開機時,會看到停留約數秒的開機管理畫面(以 CentOS 為例),如下圖:
不過對於 Ubuntu 9.10(不管是 Desktop 或是 Server 的版本)而言,在開機的過程當中,預設是不會看到如上的開機選單,而是讀取確認預設開機選項之後,就開始載入核心,進入後續的開機流程。
2、開機管理程式的設定檔案不同
以往在 grub 上面,若需要修改開機管理程式,只需要直接修改 /boot/grub 路徑下的 menu.lst 這個檔案即可:
不過,從 Ubuntu 9.10 開始,在相同路徑下,已經找不到 menu.lst 這一個檔案,取而代之的,則是 grub.cfg :
但是可不要認為 grub.cfg 就等同於以往的 menu.lst ,也不要以為可以利用修改 grub.cfg 來改變開機管理程式的相關設定,這可是兩個完全不一樣的檔案喔。
3、修改與執行的方式不同
既然修改的方式與執行方式有所不同,那麼,是差在哪邊呢?
以 grub 來說,若需要修改開機管理程式的設定,只需要直接修改 menu.lst 一個檔案即可,而且修改完成即直接套用,完全部需要再額外執行任何程式(重新開機不算喔~),舉例來說,若需要 grub 的開機管理程式在開機過程中停留較長的時間(系統預設是 5 秒),只需要在 menu.lst 檔案內,修改「timeout」這個項目的數值即可,如改為停留 30 秒,如下圖:
且最方便的地方,就是修改完成,就直接套用到系統之上,而且直接重新開機就可以看到效果,如下圖:
反觀新版的 grub2 ,在修改、執行與套用之上就比較沒有這麼直覺了。由前述可以知道,實際執行開機管理程式是在 /boot/grub 目錄下 grub.cfg 這一個檔案,但是這個檔案卻需要利用一大組程式來產生,而這些程式則存在 /etc/grub.d 目錄之下:
看到這麼多隻程式,可不要頭昏了,而且,實際修改的設定檔,也不是存放在這個目錄之下,這些,只是要利用設定檔來產生開機管理程式執行檔所需要用到的程式組,而真正的設定檔,則是存放在 /etc/default 目錄下的 grub 這一個檔案:
利用編輯器開啟 grub 這一個檔案,其檔案預設內容如下:
那麼,該如何使用這一個設定檔呢?
這邊利用兩個範例來簡單說明:
a、延長開機等待時間:直接修改紅色框框的項目,其中,「GRUB_HIDDEN_TIMEOUT」代表的是延遲時間,預設值是 0 秒,而「GRUB_HIDDEN_TIMEOUT_QUIET」則是表示延遲功能是否關閉,預設值是〝true〞,修改範例如下:
修改完成,在 grub2 可不會直接套用,所以即使重新開機,也不會套用剛剛的設定值,而是需要再執行以下的指令,真正的設定值,才會藉由 /etc/grub.d 目錄之下的程式組,將新的設定直寫到 /boot/grub 目錄下的 grub 檔案之內,其指令如下,若提示需要輸入密碼,請輸入管理員密碼:
# sudo update-grub
執行完成,重新開機之後,就會在畫面右上角看到一個倒數的數字,而這表示剛剛的設定值已經套用在開機管理程式之中了:
b、顯示開機管理選單:重新開啟 /etc/defult/grub 的檔案,將剛剛的 「GRUB_HIDDEN_TIMEOUT」與「GRUB_HIDDEN_TIMEOUT_QUIET」這兩行加上註解標記:
儲存檔案,跳出編輯畫面之後,別忘了還需要執行一次〝sudo update-grub〞,之後再重新開機,就可以看到開機管理程式的選單了:

另外附帶一點,「GRUB_TIMEOUT」 這一個項目,是控制開機管理選單的停留時間~
以上就是針對新版 grub2 的一些簡易介紹,希望能為大家提供一個入門的方向!!
GNOME 桌面 應用程式 -------------------------------
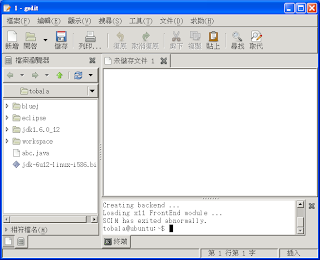
gedit 是 GNOME 桌面環境內建的輕量級文字編輯器,如果在 Windows 系統, 就相當於 記事本(Notepad),但是 gedit 的功能相對於 記事本 要來的強大許多,像是存取各種語言編碼的文件或撰寫 程式 (java, php, python,...). 它甚至在可編輯畫面中, 開啟 終端機執行 Linux 系統命令 .
安裝 gedit 命令如下 :$ sudo apt-get install gedit-common$ sudo apt-get install gedit-plugins[注意] 如使用 Ubuntu 8.04.2 版, 你還必須安裝
hicolor-icon-theme 及
gnome-icon-theme 這二個套件, 這樣才能在 gedit 正常啟動 "檔案瀏覽器", 否則你會看到以下錯誤訊息 :
** (gedit:4847): WARNING **: Could not load theme icon gnome-fs-home: 圖示 gnome-fs-home 不存在於佈景主題中
** (gedit:4847): WARNING **: Could not load theme icon gnome-fs-regular: 圖示 gnome-fs-regular 不存在於佈景主題中
** (gedit:4847): WARNING **: Could not load theme icon file-manager: 圖示 file-manager 不存在於佈景主題中
啟動 gedit 命令如下 :$ gedit
瀏覽器已是目前主要的應用程式, 在 Linux 系中, Firefox 是使用最普遍的, 以下為安裝命令 :
安裝 firefox 命令如下 :# sudo apt-get install firefox
啟動 firefox 命令如下 :# firefox
完成上述命令, 你會發覺所啟動的應用程式, 無法正常顯示中文. 如要正常顯示中文, 則需安裝 X Window 及 GNOME 華文套件, 命令如下 :
安裝 X Window 華文套件------------------------------
$ sudo apt-get install language-pack-zh讀取套件清單中... 完成
了解套件依存關係中
Reading state information... 完成
The following packages were automatically installed and are no longer required:
libstdc++6-4.3-dev linux-headers-2.6.27-7 g++-4.3 libgomp1 g++ linux-libc-dev gcc-4.3 gcc libtimedate-perl dpkg-dev
libc6-dev patch binutils make
Use 'apt-get autoremove' to remove them.
下列的【新】套件都將被安裝:
language-pack-zh-base
建議(Suggested)的套件:
language-support-zh
下列的【新】套件都將被安裝:
language-pack-zh language-pack-zh-base
更新 0 個套件,新安裝 2 個套件,刪除 0 個套件,另不更新 2 個套件。
需要下載 4237kB 的檔案。
After this operation, 14.5MB of additional disk space will be used.
繼續執行嗎? 是按 [Y] 鍵,否按 [n] 鍵 y
下載:1 http://tw.archive.ubuntu.com intrepid-updates/main language-pack-zh-base 1:8.10+20081107 [4235kB]
下載:2 http://tw.archive.ubuntu.com intrepid-updates/main language-pack-zh 1:8.10+20081107 [2012B]
讀取 4237kB 用了 1min19s (53.1kB/s)
選中了曾被取消選擇的套件 language-pack-zh-base。
(正在讀取資料庫 ... 系統目前總共安裝有 21915 個檔案和目錄。)
正在解壓縮 language-pack-zh-base (從 .../language-pack-zh-base_1%3a8.10+20081107_all.deb) ...
選中了曾被取消選擇的套件 language-pack-zh。
正在解壓縮 language-pack-zh (從 .../language-pack-zh_1%3a8.10+20081107_all.deb) ...
正在設定 language-pack-zh (1:8.10+20081107) ...
正在設定 language-pack-zh-base (1:8.10+20081107) ...
Generating locales...
zh_CN.UTF-8... done
zh_HK.UTF-8... done
zh_SG.UTF-8... done
zh_TW.UTF-8... up-to-date
Generation complete.$ sudo apt-get install language-support-zh讀取套件清單中... 完成
了解套件依存關係中
Reading state information... 完成
下列的套件曾因其他套件而被自動安裝,現在已不需要:
libstdc++6-4.3-dev linux-headers-2.6.27-7 g++-4.3 libgomp1 g++ linux-libc-dev gcc-4.3 gcc libtimedate-perl dpkg-dev
libc6-dev patch binutils make
使用 'apt-get autoremove' 來移除他們。
下列的【新】套件都將被安裝:
fontconfig hicolor-icon-theme im-switch language-support-fonts-zh language-support-input-zh
language-support-translations-zh libatk1.0-0 libatk1.0-data libcairo2 libchewing3 libchewing3-data libcups2
libdatrie0 libglib2.0-0 libglib2.0-data libgtk2.0-0 libgtk2.0-bin libgtk2.0-common libjpeg62 libpango1.0-0
libpango1.0-common libpixman-1-0 libscim8c2a libthai-data libthai0 libtiff4 libxcb-render-util0 libxcb-render0
libxcomposite1 libxfont1 openoffice.org-help-zh-cn openoffice.org-help-zh-tw openoffice.org-l10n-common
openoffice.org-l10n-zh-cn openoffice.org-l10n-zh-tw scim scim-bridge-agent scim-bridge-client-gtk scim-chewing
scim-gtk2-immodule scim-modules-socket scim-modules-table scim-pinyin scim-tables-zh thunderbird-locale-zh-cn
thunderbird-locale-zh-tw ttf-arphic-bsmi00lp ttf-arphic-gbsn00lp ttf-arphic-ukai ttf-arphic-uming ttf-wqy-zenhei
x-ttcidfont-conf xfonts-encodings xfonts-utils xfonts-wqy xutils xutils-dev
建議(Suggested)的套件:
language-support-extra-zh cups-common librsvg2-common ttf-kochi-gothic ttf-kochi-mincho ttf-thryomanes ttf-baekmuk
ttf-arphic-gkai00mp ttf-arphic-bkai00mp hunspell-dictionary-zh-cn myspell-dictionary-zh-cn
openoffice.org-hyphenation-zh-cn openoffice.org2-thesaurus-zh-cn hunspell-dictionary-zh-tw myspell-dictionary-zh-tw
openoffice.org-hyphenation-zh-tw openoffice.org2-thesaurus-zh-tw scim-uim scim-hangul scim-m17n scim-prime
scim-anthy scim-skk scim-canna scim-tables-additional scim-tables-ja scim-tables-ko scim-thai tfm-arphic-bsmi00lp
xserver-xorg xfs-xtt xfs tfm-arphic-gbsn00lp
下列的【新】套件都將被安裝:
fontconfig hicolor-icon-theme im-switch language-support-fonts-zh language-support-input-zh
language-support-translations-zh language-support-zh libatk1.0-0 libatk1.0-data libcairo2 libchewing3
libchewing3-data libcups2 libdatrie0 libglib2.0-0 libglib2.0-data libgtk2.0-0 libgtk2.0-bin libgtk2.0-common
libjpeg62 libpango1.0-0 libpango1.0-common libpixman-1-0 libscim8c2a libthai-data libthai0 libtiff4
libxcb-render-util0 libxcb-render0 libxcomposite1 libxfont1 openoffice.org-help-zh-cn openoffice.org-help-zh-tw
openoffice.org-l10n-common openoffice.org-l10n-zh-cn openoffice.org-l10n-zh-tw scim scim-bridge-agent
scim-bridge-client-gtk scim-chewing scim-gtk2-immodule scim-modules-socket scim-modules-table scim-pinyin
scim-tables-zh thunderbird-locale-zh-cn thunderbird-locale-zh-tw ttf-arphic-bsmi00lp ttf-arphic-gbsn00lp
ttf-arphic-ukai ttf-arphic-uming ttf-wqy-zenhei x-ttcidfont-conf xfonts-encodings xfonts-utils xfonts-wqy xutils
xutils-dev
更新 0 個套件,新安裝 58 個套件,刪除 0 個套件,另不更新 2 個套件。
需要下載 77.4MB 的檔案。
After this operation, 234MB of additional disk space will be used.
繼續執行嗎? 是按 [Y] 鍵,否按 [n] 鍵 y
安裝 GNOME 華文套件------------------------------
$ sudo apt-get install language-pack-gnome-zh
讀取套件清單中... 完成
了解套件依存關係中
Reading state information... 完成
下列的套件曾因其他套件而被自動安裝,現在已不需要:
libstdc++6-4.3-dev linux-headers-2.6.27-7 g++-4.3 libgomp1 g++ linux-libc-dev gcc-4.3 gcc libtimedate-perl dpkg-dev
libc6-dev patch binutils make
使用 'apt-get autoremove' 來移除他們。
下列的【新】套件都將被安裝:
language-pack-gnome-zh-base
下列的【新】套件都將被安裝:
language-pack-gnome-zh language-pack-gnome-zh-base
更新 0 個套件,新安裝 2 個套件,刪除 0 個套件,另不更新 2 個套件。
需要下載 4016kB 的檔案。
After this operation, 14.3MB of additional disk space will be used.
繼續執行嗎? 是按 [Y] 鍵,否按 [n] 鍵 y啟動 GNOME 中文應用程式----------------------------------
1. 啟動 gedit, 畫面如下 :
1. 啟動 firefox, 畫面如下 :

上述的二個 GNOME 應用程式 (gedit, firefox), 是有中文畫面, 卻無法中文輸入, 這是因為 SCIM 中文輸入系統沒被啟動, 在啟動 SCIM 之前, 先執行設定程式 (scim-setup) , 去設定輸入法啟動按鈕 (alt+space), 設定命令如下 :
# sudo scim-setup
執行成功, 會出現以下畫面 :

輸入法設定好, 接著設定啟動方式. 使用者登入便會自動啟動 SCIM, 設定方式如下 :
編輯 .bashrc 檔, 增加內容如下 :
$ nano nano .bashrc :
export XMODIFIERS=@im=scim
export GTK_IM_MODULE=scim
scim&
編輯後請登出, 然後再登入. 啟動 GNOME 應用程式後, 按 alt+space 便可執行中文輸入
將 微軟的 Windows 系統 (XP/Vista), 做為 Linux 系統的工作站 (X Server) 來使用, 這麼一來 Ubuntu JeOS 既使沒有 圖形介面系統 (X Window), 一樣可以將 X 應用程式的視窗介面, 在 Windows XP/Vista 系統中顯示
在 X Window 系統中, 視窗應用程式的執行, 分成二個部份, 一為應用程式主體, 另一是應用程式介面. 應用程式主體必須在裝有 X Window Client 的系統中執行, 這由 Ubuntu JeOS 來扮演, 而 應用程式介面則是在裝有 X Server 的系統中執行, 這由 微軟的視窗系統 (Windows XP/Vista) 來扮演.
建置 X Window Clients 系統-------------------------------------
將 X Window Client 系統, 安裝到 Ubuntu JeOS 系統中, 主要用來執行 X 應用程式主體, 安裝命令如下:
# sudo apt-get install xbase-clients裝好後便有 xclock 及 xcalc 這二個 X Window 小程式可使用
啟動 X 應用程式--------------------
將 Xming 這程式安裝到 Windows 系統 (XP/VISTA)中, 使之成為 X PC Server, 完整步驟如下 :
1. 安裝 Xming 程式
下載 : http://www.straightrunning.com/XmingNotes/
2. 啟動 Xming
c:\>Xming.exe :0 -dpi 100 -clipboard -multiwindow
3. 使用 putty (ssh), 登入 Ubuntu JeOS 系統
 putty 官方網址
 : http://www.chiark.greenend.org.uk/~sgtatham/putty/
4. 啟動 xclock 應用程式
在 putty 的終端機視窗中, 輸入 xclock 命令, 如執行成功, 在 桌面上會出現以下視窗

 精裝 VMware 虛擬主機
-----------------------------
在 VMware 虛擬主機, 可透過 VMware Tools 中的 vmware-toolbox 工具程式, 將虛擬硬碟檔 (*.vmdk) 縮小 (shrink), 這一來相對使得 JeOS 虛擬主機的壓縮檔 (*.zip), 變得更小. 操作步驟如下 :
1. 啟動 VMware Tools 管理程式在 putty 終端機程式中, 輸入以下命令 :
# sudo /usr/bin/vmware-toolbox
如執行成功, 會出現如下圖視窗 :

在上圖中, 點選 [Shrink] 標籤, 如出現下圖, 代表你無法執行硬碟檔 (*.vmdk) 縮小化, 那是因為, 你的 Ubuntu JeOS 虛擬主機, 有執行過 snapshot 或 linked clones.

點選 [Shrink] 標籤, 如可執行 縮小化, 先選擇要縮小的磁碟, 然後點選 [Shrink] 按鈕, 開始執行縮小化, 如下圖 :

2. 關閉 Ubuntu JeOS 虛擬主機, 然後使用壓縮軟體 (7-zip, winzip,..), 將虛擬主機的目錄壓縮成一個檔案, 相信這個壓縮檔不會太大 (大約幾百 MB)
在 VMware 的虛擬主機中, 要提升 Ubuntu JeOS 的執行效能, 那就必須在 Ubuntu JeOS 系統中, 安裝 VMware Tools. 以下的實作範例, 是在 VMware Workstation 6.5 執行 Ubuntu JeOS 8.04 系統中完成.
1. 安裝前準備- 安裝編譯所需程式 (gcc, make,..)
# sudo apt-get install build-essential linux-headers-$(uname -r)
- 安裝 VMware tools 所需的 killall 程式
# sudo apt-get install psmisc
將 C:\Program Files\VMware\VMware Workstation 目錄中的 linux.iso, 掛載到此虛擬主機的 CD/DVD (IDE) 裝置, 如下圖 :

- 掛載光碟
# mount /media/cdrom0
解壓縮 VMware Tools 安裝程式
# tar xvzf /media/cdrom0/VMwareTools*.gz
2. 開使安裝這階段會詢問你, 要安裝那些 VMware Tools 功能, 例如
vmxnet,
vmmemctl,
vmblock 等. 因 VMware Server 及 VMware Player 並沒提供 Share Folders(vmhgfs) 功能, 所以安裝過程中, 請回答不要安裝
vmhgfs, 安裝命令如下 :
# sudo vmware-tools-distrib/vmware-install.plCreating a new VMware Tools installer database using the tar4 format.
Installing VMware Tools.
In which directory do you want to install the binary files?
[/usr/bin]
What is the directory that contains the init directories (rc0.d/ to rc6.d/)?
[/etc]
What is the directory that contains the init scripts?
[/etc/init.d]
In which directory do you want to install the daemon files?
[/usr/sbin]
In which directory do you want to install the library files?
[/usr/lib/vmware-tools]
The path "/usr/lib/vmware-tools" does not exist currently. This program is
going to create it, including needed parent directories. Is this what you want?
[yes]
In which directory do you want to install the documentation files?
[/usr/share/doc/vmware-tools]
The path "/usr/share/doc/vmware-tools" does not exist currently. This program
is going to create it, including needed parent directories. Is this what you
want? [yes]
The installation of VMware Tools 7.8.4 build-126130 for Linux completed
successfully. You can decide to remove this software from your system at any
time by invoking the following command: "/usr/bin/vmware-uninstall-tools.pl".
Before running VMware Tools for the first time, you need to configure it by
invoking the following command: "/usr/bin/vmware-config-tools.pl". Do you want
this program to invoke the command for you now? [yes]
Stopping VMware Tools services in the virtual machine:
Guest operating system daemon: done
Virtual Printing daemon: done
None of the pre-built vmmemctl modules for VMware Tools is suitable for your
running kernel. Do you want this program to try to build the vmmemctl module
for your system (you need to have a C compiler installed on your system)?
[yes]
:
The vmmemctl module loads perfectly into the running kernel.
None of the pre-built vmhgfs modules for VMware Tools is suitable for your
running kernel. Do you want this program to try to build the vmhgfs module for
your system (you need to have a C compiler installed on your system)? [yes] no
The filesystem driver (vmhgfs module) is used only for the shared folder
feature. The rest of the software provided by VMware Tools is designed to work
independently of this feature.
If you wish to have the shared folders feature, you can install the driver by
running vmware-config-tools.pl again after making sure that gcc, binutils, make
and the kernel sources for your running kernel are installed on your machine.
These packages are available on your distribution's installation CD.
[ Press Enter key to continue ]
None of the pre-built vmxnet modules for VMware Tools is suitable for your
running kernel. Do you want this program to try to build the vmxnet module for
your system (you need to have a C compiler installed on your system)? [yes]
:
The vmxnet module loads perfectly into the running kernel.
update-initramfs: Generating /boot/initrd.img-2.6.27-7-server
None of the pre-built vmblock modules for VMware Tools is suitable for your
running kernel. Do you want this program to try to build the vmblock module
for your system (you need to have a C compiler installed on your system)?
[yes]
:
The vmblock module loads perfectly into the running kernel.
[EXPERIMENTAL] The VMware FileSystem Sync Driver (vmsync) is a new feature that
creates backups of virtual machines. Please refer to the VMware Knowledge Base
for more details on this capability. Do you wish to enable this feature?
[no]
None of the pre-built vmci modules for VMware Tools is suitable for your
running kernel. Do you want this program to try to build the vmci module for
your system (you need to have a C compiler installed on your system)? [yes]
:
The vmci module loads perfectly into the running kernel.
None of the pre-built vsock modules for VMware Tools is suitable for your
running kernel. Do you want this program to try to build the vsock module for
your system (you need to have a C compiler installed on your system)? [yes]
:
The VM communication interface socket family is used in conjunction with the VM
communication interface to provide a new communication path among guests and
host. The rest of this software provided by VMware Tools is designed to work
independently of this feature. If you wish to have the VSOCK feature you can
install the driver by running vmware-config-tools.pl again after making sure
that gcc, binutils, make and the kernel sources for your running kernel are
installed on your machine. These packages are available on your distribution's
installation CD.
[ Press the Enter key to continue.]
No X install found.
Checking acpi hot plug done
Starting VMware Tools services in the virtual machine:
Switching to guest configuration: done
Guest memory manager: done
Guest vmxnet fast network device: done
VM communication interface: done
Blocking file system: done
Guest operating system daemon: done
Virtual Printing daemon: done
The configuration of VMware Tools 7.8.4 build-126130 for Linux for this running
kernel completed successfully.
You must restart your X session before any mouse or graphics changes take
effect.
You can now run VMware Tools by invoking the following command:
"/usr/bin/vmware-toolbox" during an X server session.
To enable advanced X features (e.g., guest resolution fit, drag and drop, and
file and text copy/paste), you will need to do one (or more) of the following:
1. Manually start /usr/bin/vmware-user
2. Log out and log back into your desktop session; and,
3. Restart your X session.
To use the vmxnet driver, restart networking using the following commands:
/etc/init.d/networking stop
rmmod pcnet32
rmmod vmxnet
modprobe vmxnet
/etc/init.d/networking start
Enjoy,
--the VMware team3. 安裝高速網卡安裝 vmxnet 網卡驅動程式, 使網卡速度在虛擬網路中可達 1G, 安裝命令如下 :
# sudo /etc/init.d/networking stop
# sudo rmmod pcnet32
# sudo rmmod vmxnet
# sudo modprobe vmxnet
# sudo /etc/init.d/networking start
注意 : 請勿使用 ssh 終端機程式, 執行上述命令, 因網路會中斷
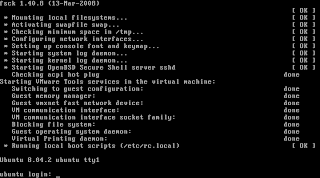
4. 重新開機執行 sudo reboot 命令, 重新啟動系統, 如安裝順利, 啟動後畫面如下 :
Ubuntu JeOS 虛擬主機第一次設定1. 更新軟體清單登入系統後, 先確定網路是否連接, 測通命令如下 :
# ping 168.95.1.1
系統更新命令如下 :
# sudo apt-get update
2. 系統升級升級命令如下 :
# sudo apt-get upgrade
3. 設定語系 (Big5)因要編輯系統文字檔, 在系統中須安裝 nano 文字編輯器, 命令如下 :
# sudo apt-get install nano
編輯系統 locale 設定檔, 命令如下 :
# sudo nano /etc/default/locale
LANG="zh_TW.Big5"
LANGUAGE="zh_TW:zh:en_US:en"
將系統 locale 改成 big5,請執行以下命令 :
# sudo locale-gen zh_TW
上述命令, 主要是提供 putty 工具軟體, 可以處理 Big5 字元
4. 清除 apt-get 命令下載的暫存檔# sudo apt-get clean
封裝 Ubuntu JeOS 虛擬主機在 VMware Workstation 開啟此虛擬主機時, 因目錄位址與原先不同, 便會出現下圖中, 如你選擇 [Copied it]

會使得網卡的 MAC 位址重新產生, 以至系統啟動後, 沒有網路系統可使用, 避免此問題發生, 在關閉此虛擬主機之前, 請執行以下命令 :
# sudo rm /etc/udev/rules.d/70-persistent-net.rules
系統關機後, 請將 Ubuntu JeOS 虛擬主機的
目錄 壓縮 (*.zip, *.rar), 便大功告成
啟動 Ubuntu JeOS 虛擬主機, 切記要指定安裝 ISO 檔. 整個安裝過程與 Ubuntu Server 類似, 重點提示如下 :
選擇安裝模式
選擇 [語系] 後, 按 F4 出現下圖, 然後選擇 [安裝最小型虛擬機器]

指定固定 IP
出現輸入 [主機名稱] 畫面, 如下圖 :

在上圖中, 輸入主機名稱後, 按 Esc 鍵會出現下圖, 請選擇 [手動設定網路]

在下圖中, 輸入 IP 位址

在下圖中, 請選擇 [使用整顆磁碟], 磁碟會被分割成二個分割區, 分別是 ext3 及 swap

在下圖中, 輸入使用者完整姓名, 這不是登入的帳號名稱, 請勿記錯

在下圖中, 輸入要登入的帳號名稱

在下圖中, 輸入帳號的密碼

啟動 VMware Workstation 6.5, 點選 [File][New][Virtual Machine], 然後以問答的方式, 產生用來執行 Ubuntu JeOS 的虛擬主機. 在產生虛擬主機的過程, 記得要選取安裝所需的 ISO 檔, 如下圖 :

最後完成的 Ubuntu JeOS 虛擬主機規格, 如下圖 :
 [注意]
[注意] 在 CD/DVD 裝置中, 可指定的 Ubuntu JeOS 安裝映像檔 (*.iso), 如是 8.04 請選擇
jeos-8.04.1-jeos-i386.iso, 如是 8.10 請選擇
ubuntu-8.10-server-i386.iso
最近興起一個移動性應用技術, 稱之為 JeOS (Just enough Operating System), 發音為 Juice (果汁). 這技術之所以具有移動性, 那是因為它將 Linux 加上 應用系統 (人資, 財會, CRM, Wiki,...), 整個放入 VMware 的虛擬主機. 這樣的整合對於 Linux 作業系統, 採取 "夠用就好" 設計規範, 使得包裝後的 VMware 虛擬主機, 不至體積過大, 以至不易佈署與使用
JeOS 相關網站
- Ubuntu JeOS - official variant of Ubuntu optimized for virtual machines
- TurnKey Linux - release easy-to-use JeOS appliances based on Ubuntu with a typical footprint of 150MB
- OEL JeOS - small footprint/JeOS edition of Oracle Enterprise Linux to build virtual appliances or templates
- Novell Jeos - official variant of Novell optimized for virtual machines


